Listen up, tech enthusiasts! If you’ve been dipping your toes into the world of IoT, you’ve probably heard about remote IoT monitoring using Raspberry Pi. It’s like having a superhero in your pocket, ready to keep an eye on your smart devices from anywhere in the world. Whether you’re a hobbyist or a pro, this setup can transform the way you manage and interact with your IoT projects. So, let’s dive in and explore how this magical combo works!
Picture this: you’re chilling at home, sipping your favorite coffee, and suddenly, you get an alert that one of your IoT sensors has detected something unusual. With remote IoT monitoring on Raspberry Pi, you can check it out instantly without lifting a finger. It’s not just about convenience; it’s about taking control of your smart ecosystem like never before.
But hold up—before we get into the nitty-gritty, let’s clarify why this matters. IoT is everywhere these days, and with more devices connecting to the internet, managing them all can get overwhelming. That’s where Raspberry Pi comes in. It’s like the Swiss Army knife of tech tools, offering versatility, affordability, and sheer power. Stick around, and we’ll break down everything you need to know about remote IoT monitoring using this tiny yet mighty device.
Read also:Matthew Settle And Kelly Rutherford The Story Of Love Challenges And Success
What Exactly is Remote IoT Monitoring?
Alright, let’s break it down. Remote IoT monitoring is like having a pair of eyes on your IoT devices, even when you’re miles away. It allows you to keep tabs on your sensors, actuators, and other connected devices in real-time. And when you combine this with Raspberry Pi, you’ve got yourself a powerhouse setup that’s both budget-friendly and packed with potential.
Here’s the deal: IoT devices generate tons of data, and keeping track of all that info manually can be a nightmare. Remote monitoring automates the process, giving you instant access to critical data points, alerts, and insights. Whether you’re monitoring environmental conditions, tracking inventory, or securing your smart home, Raspberry Pi can handle it all.
Why Raspberry Pi is the Ultimate Tool for Remote IoT Monitoring
Now, why should you choose Raspberry Pi for your remote IoT monitoring needs? Well, it’s not just about the hardware—it’s about the community, the flexibility, and the sheer possibilities it brings to the table. Let’s take a closer look:
- Cost-Effective: Raspberry Pi is super affordable, making it a no-brainer for hobbyists and professionals alike.
- Versatile: It can run a wide range of operating systems, including Linux-based distributions, giving you endless customization options.
- Scalable: From simple home automation projects to complex industrial applications, Raspberry Pi can scale to meet your needs.
- Community Support: With tons of tutorials, forums, and libraries available, you’ll never feel lost in the process.
Setting Up Remote IoT Monitoring with Raspberry Pi
So, you’re ready to dive in? Great! Setting up remote IoT monitoring with Raspberry Pi isn’t as daunting as it sounds. Here’s a step-by-step guide to get you started:
Step 1: Gather Your Materials
Before you begin, make sure you have all the necessary tools and components. You’ll need:
- A Raspberry Pi (any model will do, but newer ones offer better performance).
- A microSD card with at least 16GB of storage.
- A reliable power supply for your Raspberry Pi.
- IoT sensors or devices you want to monitor.
- An Ethernet cable or Wi-Fi connection for internet access.
Step 2: Install an Operating System
Next, you’ll need to install an operating system on your Raspberry Pi. The most popular choice is Raspbian, but you can also opt for other Linux-based distributions like Ubuntu Server. Here’s how to do it:
Read also:Unveiling The Magic Actors For Home Alone
- Download the Raspberry Pi Imager tool from the official website.
- Insert your microSD card into your computer and launch the imager.
- Select the operating system you want to install and click "Write."
Step 3: Configure Your Raspberry Pi
Once your OS is installed, boot up your Raspberry Pi and configure it to suit your needs. This includes:
- Setting up Wi-Fi or Ethernet connections.
- Configuring SSH for remote access.
- Updating the system with the latest software packages.
Choosing the Right IoT Sensors
Now that your Raspberry Pi is set up, it’s time to choose the right IoT sensors for your project. The type of sensors you use will depend on your specific needs. Here are some popular options:
- Temperature and Humidity Sensors: Perfect for monitoring environmental conditions.
- Motion Sensors: Ideal for security applications or detecting movement.
- Light Sensors: Great for automating lighting systems or tracking daylight.
- Soil Moisture Sensors: Useful for smart gardening projects.
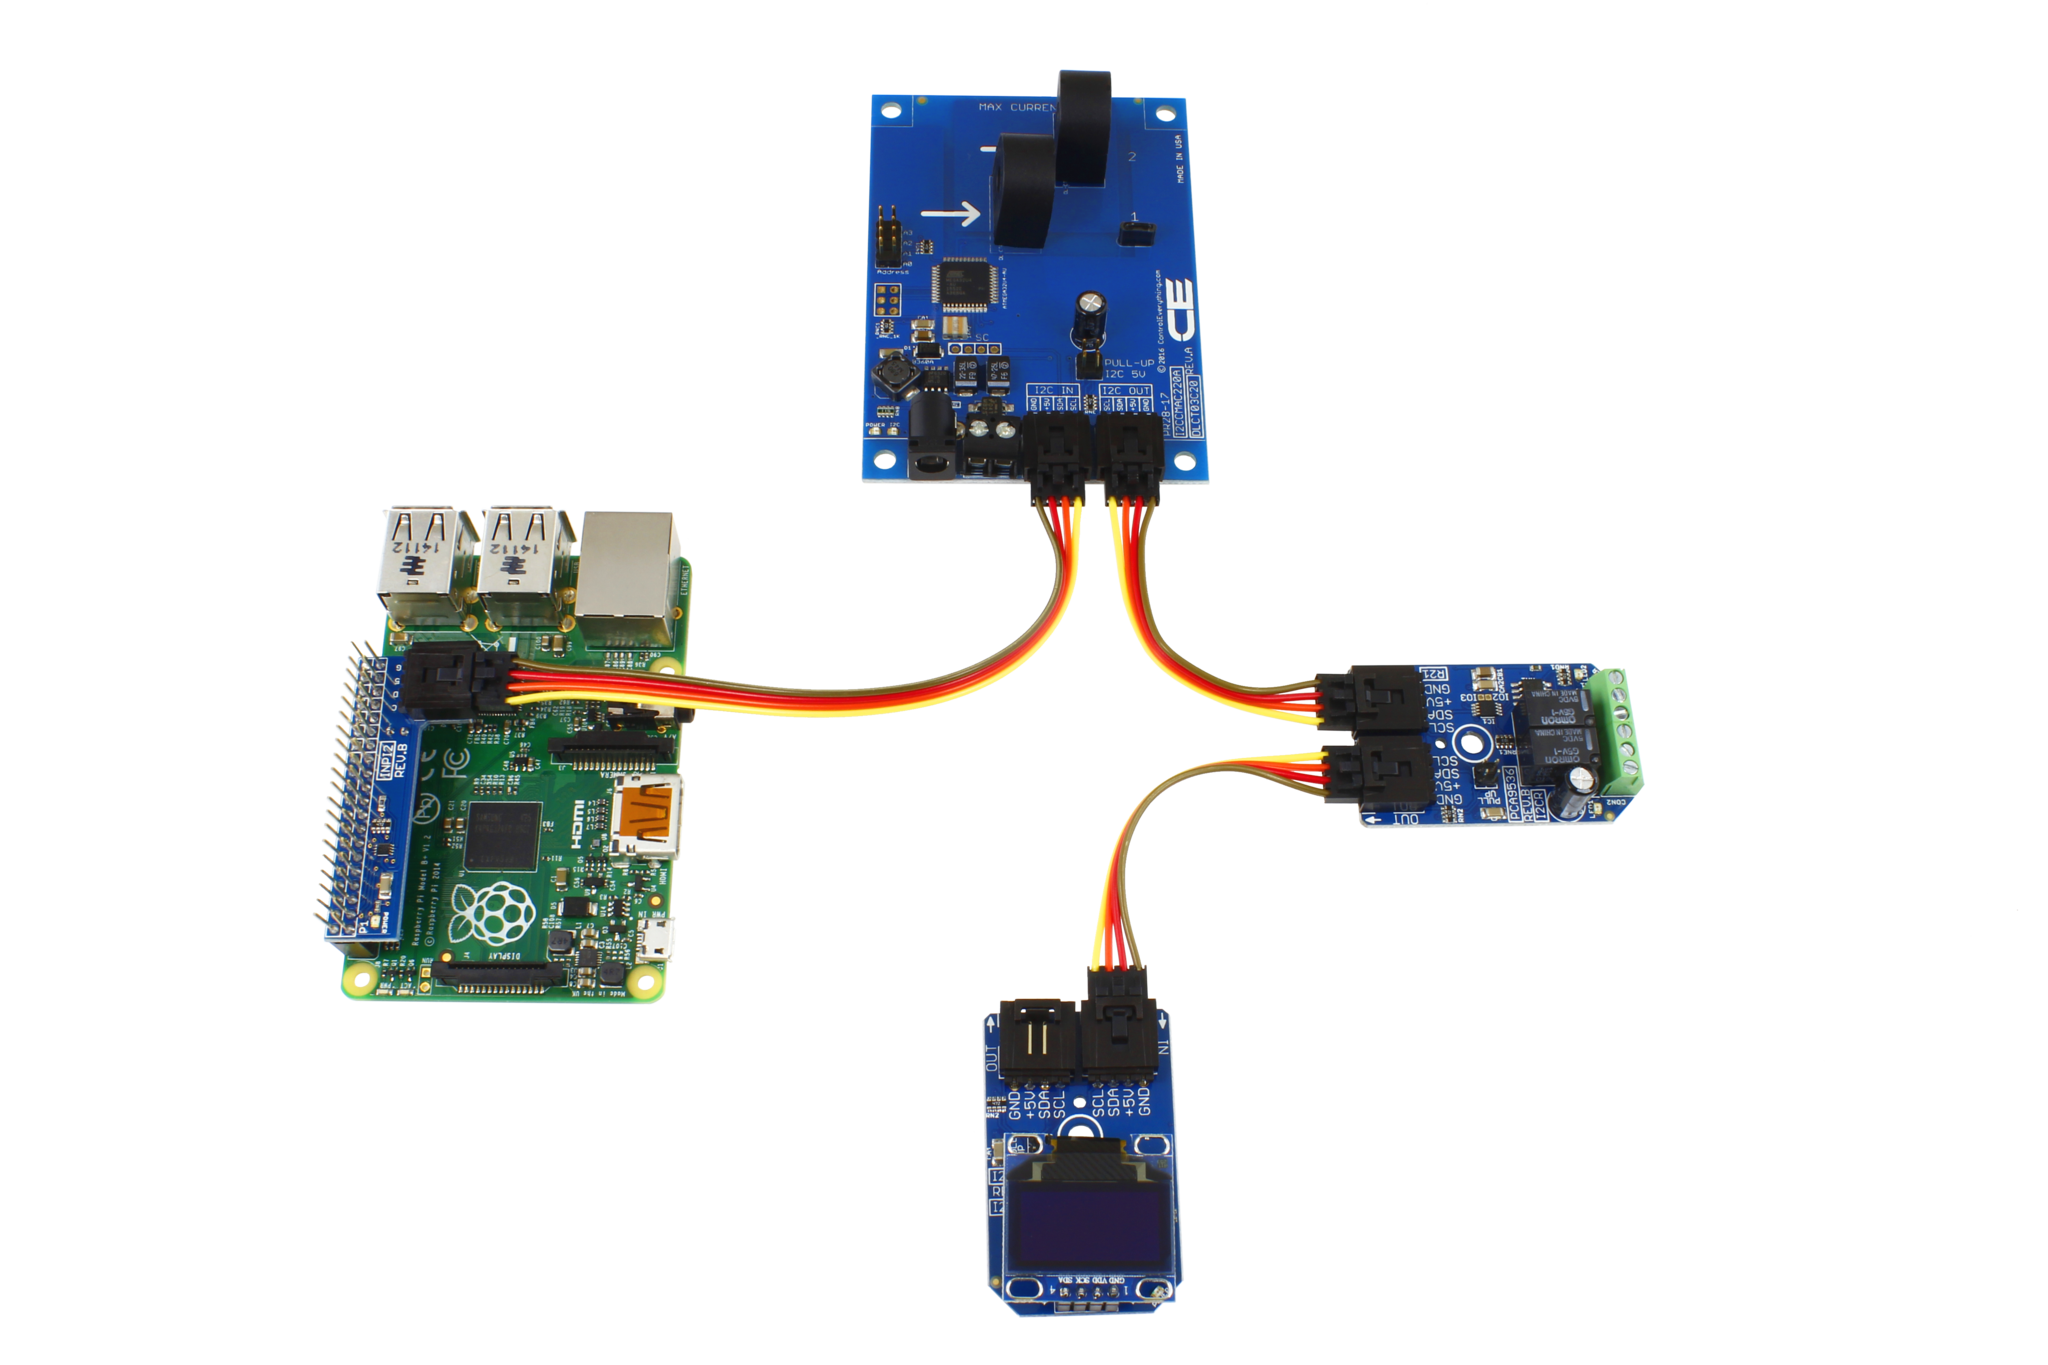
Connecting Sensors to Raspberry Pi
Connecting your sensors to Raspberry Pi is a breeze, thanks to its GPIO pins. Here’s how you can do it:
- Identify the pins on your Raspberry Pi that match your sensor’s requirements.
- Use jumper wires to connect the sensor to the appropriate pins.
- Install any necessary drivers or libraries to communicate with the sensor.
Setting Up Data Collection and Transmission
With your sensors connected, it’s time to set up data collection and transmission. This involves configuring your Raspberry Pi to send data to a remote server or cloud platform. Here’s how:
Option 1: Using MQTT
MQTT (Message Queuing Telemetry Transport) is a lightweight protocol perfect for IoT applications. Here’s how to set it up:
- Install an MQTT broker like Mosquitto on your Raspberry Pi.
- Configure your sensors to publish data to the broker.
- Set up a client on your remote server to subscribe to the broker.
Option 2: Using Cloud Platforms
Alternatively, you can use cloud platforms like AWS IoT, Google Cloud IoT, or Microsoft Azure. These platforms offer robust tools for data storage, analysis, and visualization. Plus, they integrate seamlessly with Raspberry Pi.
Securing Your Remote IoT Monitoring System
Security is a top priority when it comes to remote IoT monitoring. After all, you don’t want unauthorized access to your sensitive data. Here are some tips to keep your system secure:
- Enable SSH key authentication instead of passwords.
- Use a firewall to restrict incoming connections.
- Encrypt data transmissions using SSL/TLS.
- Regularly update your software to patch vulnerabilities.
Best Practices for IoT Security
Here are some additional best practices to follow:
- Avoid using default credentials for your devices.
- Segment your IoT network from your main network.
- Monitor logs regularly for suspicious activity.
Visualizing Your IoT Data
Data visualization is key to making sense of all the information your sensors are collecting. There are several tools you can use to create stunning dashboards and charts. Some popular options include:
- Dashboard platforms like Grafana or ThingsBoard.
- Custom-built web interfaces using frameworks like Flask or Django.
- Cloud-based solutions like Google Data Studio or Microsoft Power BI.
Creating a Custom Dashboard
If you’re feeling adventurous, you can create your own custom dashboard using Python and a web framework. Here’s how:
- Set up a Flask or Django project on your Raspberry Pi.
- Write code to retrieve sensor data and display it on a webpage.
- Style your dashboard using CSS or a front-end framework like Bootstrap.
Scaling Your Remote IoT Monitoring System
As your IoT projects grow, you may need to scale your remote monitoring system. Here are some strategies to help you do that:
- Use load balancers to distribute traffic across multiple Raspberry Pi units.
- Implement a database system like MySQL or PostgreSQL to store large amounts of data.
- Automate routine tasks using scripts or cron jobs.
Handling Large-Scale IoT Deployments
For large-scale deployments, consider using containerization tools like Docker to manage your applications. This ensures consistency across different environments and makes it easier to deploy updates.
Real-World Applications of Remote IoT Monitoring with Raspberry Pi
The possibilities with remote IoT monitoring on Raspberry Pi are endless. Here are some real-world applications:
- Smart Agriculture: Monitor soil moisture, temperature, and humidity to optimize crop growth.
- Home Automation: Control lighting, heating, and security systems from anywhere.
- Industrial IoT: Monitor machinery performance and predict maintenance needs.
- Healthcare: Track patient vitals remotely for better healthcare outcomes.
Conclusion: Take Your IoT Projects to the Next Level
And there you have it—a comprehensive guide to remote IoT monitoring using Raspberry Pi. This powerful setup offers endless possibilities for hobbyists and professionals alike. By following the steps outlined in this article, you can create a robust, secure, and scalable system that meets your needs.
So, what are you waiting for? Grab your Raspberry Pi, gather your sensors, and start building your dream IoT project. And don’t forget to share your experiences in the comments below. Who knows? You might inspire someone else to take the leap into the world of IoT!
Table of Contents
- Revolutionize Your IoT Game with Remote IoT Monitoring on Raspberry Pi
- What Exactly is Remote IoT Monitoring?
- Why Raspberry Pi is the Ultimate Tool for Remote IoT Monitoring
- Setting Up Remote IoT Monitoring with Raspberry Pi
- Choosing the Right IoT Sensors
- Setting Up Data Collection and Transmission
- Securing Your Remote IoT Monitoring System
- Visualizing Your IoT Data
- Scaling Your Remote IoT Monitoring System
- Real-World Applications of Remote IoT Monitoring with Raspberry Pi